Pinwheel Cookies are one of the most fancy yet simple cookies that one can make, and you don’t need to wait for a holiday or special occasion to bake these beauties. These two-toned cookies are an instant hit at any party or celebration. Take them to a potluck and people will thank you for your dish. Wrap them in fancy paper napkins and hand them out at a Backyard Bash. Or just fill them in a cookie-jar and ship them off to friends and family. Everyone loves these cute and delicious cookies because they help bring out the child in you!
You can get as creative as you want with the design factor; instead of choosing the standard brown and white, mix and match colors, get your kids involved in tinting and rolling out the dough – make it a fun family project, and you’ll love every bit of making Pinwheel Cookies.
I agree, some people are inherently intimidated by the pinwheel process, including me, but when you have the right tutorial at your disposal, along with a great video to walk you through the process, then anyone and everyone can create beautiful cookies in their kitchen.
The key is in rolling out your dough correctly, not too thin and not too thick. Also, no matter how experienced a baker you are, make sure to use flour for dusting and parchment paper to roll the dough. Weather can do nasty things to your cookie dough, so it’s better to be safe than sorry! You want your cookies to be shaped nice and clean, not blotchy because the dough became too dry or too sticky.
Ok, enough of my ranting, now let’s get straight into the recipe, and be prepared to bake the most beautiful cookies that you have made so far!

- 3 cups unbleached all-purpose flour
- ½ tsp salt
- ¼ tsp baking soda
- 1-1/4 cups unsalted butter, slightly softened
- 1-1/4 cups granulated sugar
- 1 large egg
- 1-1/2 tsp pure vanilla extract
- 1 tsp instant espresso powder
- 2 Tbs boiling water
- 3 Tbs unsweetened Dutch-processed cocoa powder
- 3 oz bittersweet chocolate, melted and still warm
- Making the dough:
- Sift together the flour, salt, and baking soda. In the bowl of a stand mixer fitted with the paddle attachment, cream the butter on medium-low speed until smooth, about 2 min. Add the sugar in a steady stream and mix for another 2 min. Add the egg and vanilla and mix until well combined, scraping the bowl as needed. Reduce the speed to low and add the dry ingredients in two additions, mixing just until combined. Remove 2 cups less 2 Tbsp. of the dough and set aside. This is the white dough.
- Dissolve the espresso powder in the boiling water and set aside briefly to cool. Then mix the espresso and cocoa powder into the remaining dough. Reduce the mixer speed to low, add the warm melted chocolate and mix just until thoroughly combined.
- Roll the pinwheel logs:
- Portion each flavor of dough into three equal pieces. Shape each piece into a 5x5-inch square on a piece of plastic wrap and wrap well. The chocolate will be thicker than the vanilla. Refrigerate the dough for 30 min. (If the dough becomes too hard, let it stand at room temperature for a few minutes before rolling).
- While the dough is chilling, keep 12-inch squares of waxed paper ready. Roll each piece of dough into a 7x7-inch square between two sheets of the waxed paper. Without removing the waxed paper, layer the squares of dough on a baking sheet and refrigerate for 10 to 15 min. Have ready three 15-inch sheets of plastic wrap.
- To shape the cookies, remove one square of the vanilla dough and one square of the chocolate dough from the refrigerator and peel off the top sheet of waxed paper from each. Invert the chocolate square over the vanilla square, taking care to align the two layers as evenly as possible. Using your rolling pin, gently roll over the dough to seal the layers together. Peel off the top layer of waxed paper.
- Starting with the edge of the dough closest to you, carefully curl the edge of the dough up and over with your fingertips, so no space is visible in the center of the pinwheel.
- Using the waxed paper as an aid, continue rolling the dough into a tight cylinder. After the cylinder is formed, roll it back and forth on the counter to slightly elongate it and compact it. Transfer the log to the plastic wrap, centering it on the long edge closest to you. Roll tightly, twisting the ends of the plastic firmly to seal. With your hands on either end of the log, push firmly toward the center to compact the dough. It should be about 9 inches long and 1-1/2 inches thick. Repeat with remaining dough. Refrigerate the logs until firm enough to slice, about 3 hours, or freeze for up to three months.
- Bake the cookies:
- Position racks in the upper and lower thirds of the oven. Heat the oven to 350°F. Line two rimmed baking sheets with parchment. Working with one log at a time, use a sharp, thin-bladed knife to slice the dough into 3/16-inch rounds.
- Set the rounds about 1 inch apart on the prepared pans and bake until the tops of the cookies feel set, 12 to 14 min. (don’t let the edges become too brown). To ensure even browning, rotate the sheets as needed during baking.
- Let the baked cookies stand for 1 minute on the pan. While they’re still warm, use a thin metal spatula to transfer them to racks. When cool, store between sheets of waxed paper in an airtight container for up to two weeks, or freeze for up to three months.
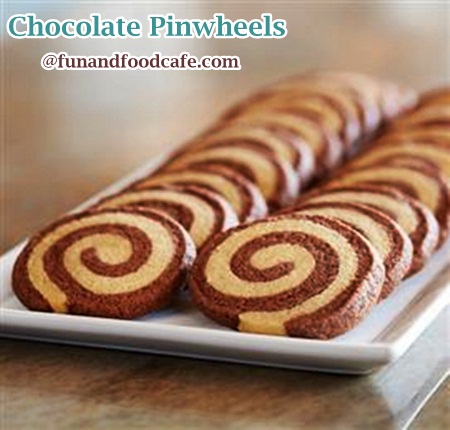
These Chocolate pinwheel cookies, with their swirls of light and dark doughs, are doubly appealing and look great wrapped as a gift! And somehow they have an effect of catering to the child within you; they are great to look at too, with their Ying-Yang kind of effect, and make you see two sides of the same coin, if you can force yourself to actually reflect upon all these things without just gobbling them up! The preparation time might seem a bit long, especially with the refrigeration that is needed to carve beautiful cookies. But make this a fun weekend project with kids – it will teach them the art of patience, to make something from scratch and wait for it to be done, and at the end, it will be a memorable day for both you and your kids!


Hi Kdsingh , I haven’t tried an eggless recipe, but I think substituting just one egg should not be hard. Check out some egg substitutes that I discuss in this article:
http://funnfud.blogspot.com/2008/08/eggless-recipes-baking-substitutes-egg.html
Also, I came across an eggless pinwheel recipe on the web. See if this helps!
http://www.food.com/recipe/eggless-pinwheel-cookies-195715
They are perfect..Can you tell how to make eggless ?..I appreciate your help…Thanks
They are perfect. Thanks for the video they help quite a bit
They look so perfect!!!
Thanks guys! now you should be able to make them too:)
wow, they are simply drool-worthy !!!
oh, this looks so delicious! I`m absolutely sure that`s really tasty!
Have a great time,
Paula
wow..these cookies are amazing ! Loving the perfection of pinwheel !
These look great! The final picture looks like something I could never achieve. The printable recipe was useful and the video really helped me understand some of the more tedious parts of the recipe. These would be great cookies for a cookie swap!